|
|||||||||
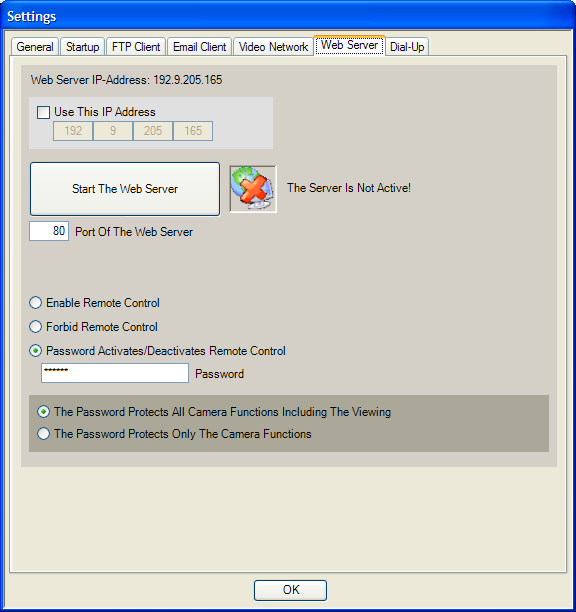
CamUniversal Manual The Webserver The integrated webserver of CamUniversal allows to control all cameras which are running in CamUniversal. The webserver sends the video pictures from all cameras by HTTP request. Additional the webserver allows to start an external program. If the webserver is running you could
send HTTP commands to CamUniversal. These commands are interpreted
by the webserver. For your convenience there are the following
html sample documents included "cam_control.htm",
"cam_view1.htm", "cam_view2.htm", "cam_view3.htm".
These documents are using JAVA scripts to send the webserver
commands to CamUniversal. More information about setting up the integrated webserver can be found in the CrazyPixels Forum here and in the First Steps! Here are all possible commands listed:Picture receiving: http://192.168.110.100 - first insert the IP address of the PC running CamUniversal (the displayed address is an example!) http://192.168.110.100:81/ - then insert the port which you have choosen in CamUniversal http://192.168.110.100:81/camera=1 - then insert the camera number you would control, 1 = the first camera http://192.168.110.100:81/camera=1&quality=40 - then insert the quality of the received video picture. If you want to receive the camera pictures in short intervals it is better to select a low quality. http://192.168.110.100:81/camera=1&resolution=160x120&quality=40 - if you want, you can select the resolution of the received video picture. If you don't select a resolution, the picture has the resolution of the camera. Remote commands: You can control the camera from remote. http://192.168.110.100:81/camera=1&command=preview_on (starts the preview for camera 1) http://192.168.110.100:81/camera=1&command=preview_off (stops the preview for camera 1) http://192.168.110.100:81/camera=1&command=motion_on (starts the motion detector for camera 1) http://192.168.110.100:81/camera=1&command=motion_off (stops the motion detector for camera 1) http://192.168.110.100:81/camera=1&command=scheduler_on (starts the scheduler for camera 1) http://192.168.110.100:81/camera=1&command=scheduler_off (stops the scheduler for camera 1) http://192.168.110.100:81/camera=1&command=record_on (starts the video recording for camera 1) http://192.168.110.100:81/camera=1&command=record_off (stops the video recording for camera 1) http://192.168.110.100:81/camera=1&command=capture (captures a picture from camera 1) http://192.168.110.100:81/camera=1&command=state (asks the state from camera 1) If you have choosen to activate/deactivate the remote control by password you have to do this with the following 2 commands: http://192.168.110.100:81/activate_remote_control=password (activates the remote control) http://192.168.110.100:81/deactivate_remote_control=password (deactivates the remote control) Additional you can start all external programs which are available on your system. The camera number is ignored in this command! After "execute" insert the path to the program on your system. http://192.168.110.100:81/camera=1&command=executec:\windows\system32\calc.exe (starts an external program) |

