|
||||||||||
WebCam-Control-Center Manual
First Steps Sending an email at motion detection
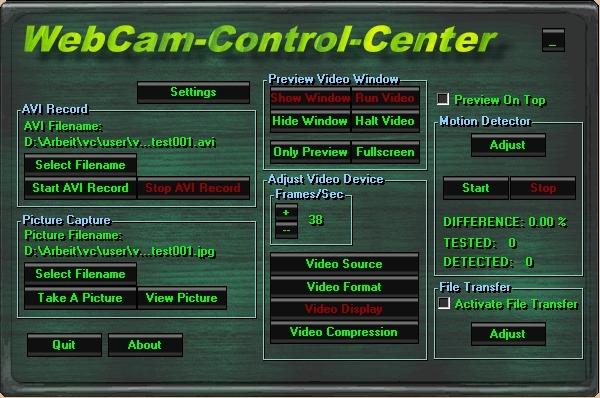
Sending an email at motion detection Step 1 main dialog -
select adjust from the motion detector section
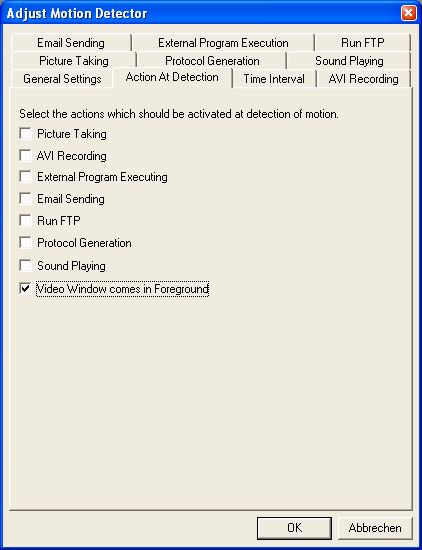
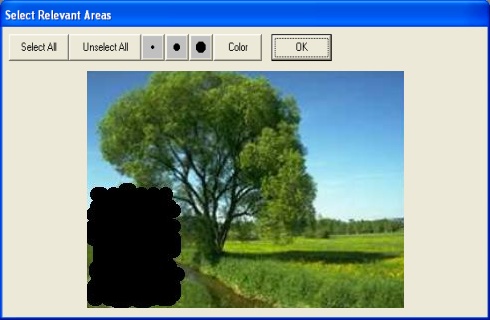
You have to select which areas of the video picture should be tested for a motion. The pixels in this selected areas are the only ones which are tested for differences. Step 2 adjust motion detector dialog - select from the action at detection dialog the email sending option
If you want to take a picture before sending the email, select take a picture before sending .If you want to attach the picture which causes the motion, you don't need to select this option, you have to include the akt.jpg picture within the choose files to attach dialog. If you want to record an AVI before sending, select record an AVI Video before sending. All files which should be attached to the email, must be selected within the choose files to attach dialog. Then you have to go to the general settings dialog and select the standard motion detector settings. How to test the current picture and how often to test for motion. Select how many % of the selected area should be different to the reference picture, to report a motion. Select a COLOR-VALUE-DIFF value, which is important for the pixel comparsion. If you want a delay for the motion detection between starting the motion detection from the main dialog and beginning to test for motions, select the at start of the motion detector wait option. Step 3 main dialog - select adjust from the file transfer section. Select the email sending dialog.
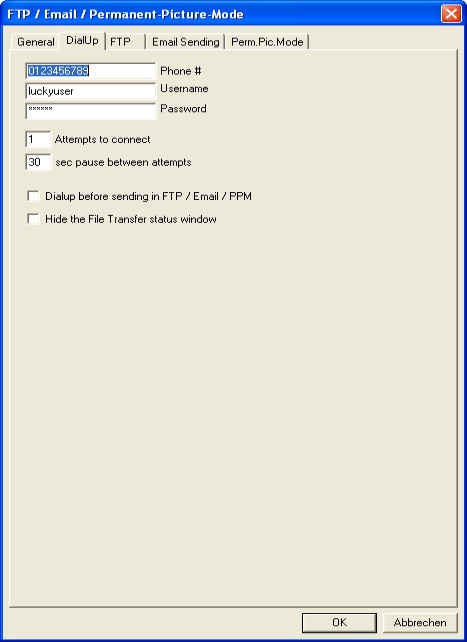
If you are not already online and want to dial up before email sending select the dialup before FTP/email/ppm option from the dialup dialog. Input your dial up settings. You can hide the file transfer status window by selecting the hide the file transfer status window option.
It is not necessary to select the activate email option, because this is only necessary for email sending in intervalls within the file transfer mode. For the motion detection mode, you have selected the email sending in Step 2. Step 4 main dialog - select picture settings from the settings dialog.
Step 5
Press the start button from the motion detector section. Don't select activate file transfer, because this is only for email/FTP sending in intervals or for the Permanent-Picture-Mode.
Play an alarm sound at motion detection main dialog - select adjust from
the motion detector section
You have to select which areas of the video picture should be tested for a motion. The pixels in this selected areas are the only ones which are tested for differences. Step 2 main dialog - select adjust from the motion detector section
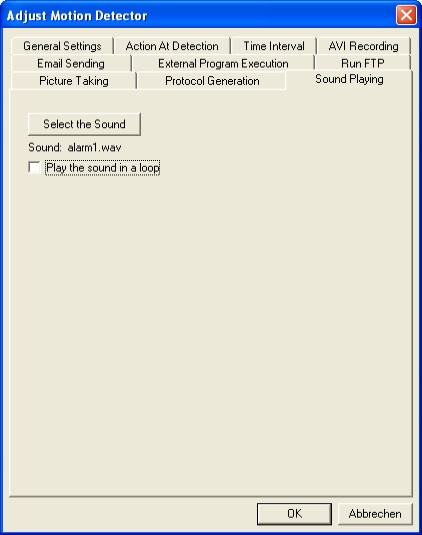
Select the sound playing option
from the action at detection dialog.Then select the sound
playing dialog. If you want to let the sound play in a loop select play
the sound in a loop. Press the select the sound button
to select the WAV file, which should be played. Step 3
Press the start button from the motion detector section.
Periodic generating a picture on your harddisk Step 1 main dialog - select adjust from the file transfer section
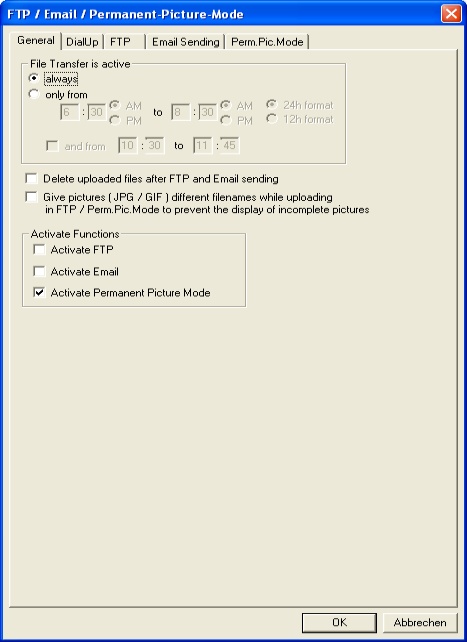
We use the Permanent-Picture-Mode for our purpose. Select the activate Permanent-Picture-Mode option from the general dialog.
Then select the Perm.Pic.Mode dialog.
Select in which intervals the picture should be taken. You can
select take a picture continuously to take the picture often
as possible. Or select the interval in seconds with the take
a picture every x sec option. Press the select the picturefilename button
to select a filename for the picture. If you want to stop the picture
taking for a while, select stop after x sec and restart
after x sec. So you can take pictures, let's say, every 3 seconds,
for a duration of 5 minutes, with 10 minutes pause between. Let
the options for the stop and restart time unchecked to use the
whole time your selected interval without an interruption. If you have a LAN, you can install a webserver program to let all people see what the camera connected to your PC is seen. Step 2
Select the activate file transfer option to activate the Permanent-Picture-Mode.
Periodic generating a number of pictures with different filenames on your harddisk Step 1 main dialog - select adjust from the motion detector section
We use the motion detection for our
purpose.
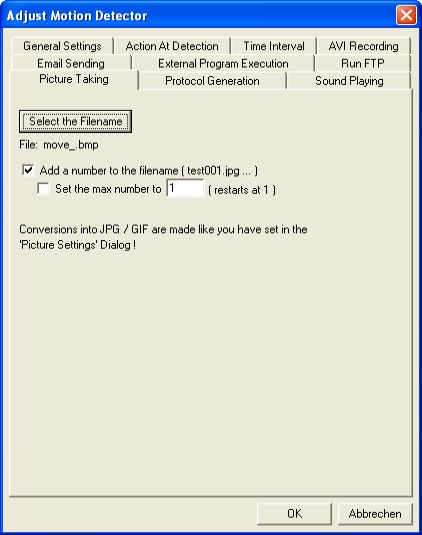
Now select the picture taking option
from the action at detection dialog.
Press the start button from the motion detector section.
Periodic upload a picture to your webpage Step 1 main dialog - select adjust from the file transfer section
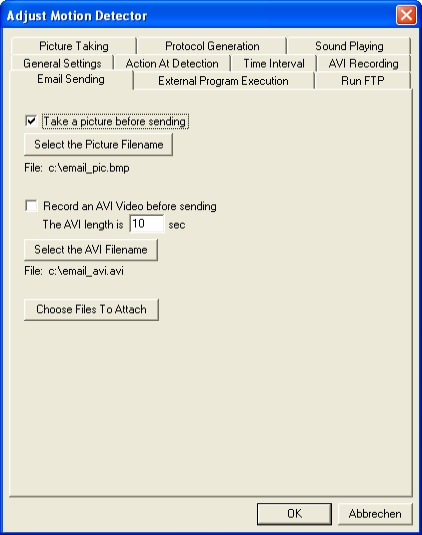
We use the Permanent-Picture-Mode for our purpose so select activate Permanent Picture Mode. You can also use the FTP mode, but there is no option for pause and restart the taking and uploading. If you use the FTP mode you have to select the picture for uploading in the choose files to transfer dialog. The second difference is, that in FTP mode the program each time it uploads files it connects to the FTP server and in PPM only at the start the FTP server connection is established. So the PPM can faster upload the pictures, the interval could be shorter, because the connection always exists. Step 2 Select the Perm.Pic.Mode dialog.
Select in which intervals the picture should be taken. You can select take a picture continuously to take the picture often as possible. Or select the interval in seconds with the take a picture every x sec option. Press the select the picturefilename button to select a filename for the picture. If you want to stop the picture taking for a while, select stop after x sec and restart after x sec. So you can take pictures, let's say, every 3 seconds, for a duration of 5 minutes, with 10 minutes pause between. Let the options for the stop and restart time unchecked to use the whole time your selected interval without an interruption. Select the send GIF picture ... option to upload a GIF picture or the send JPG picture ... option to upload the JPG picture or both. Step 3 Select the dialup dialog.
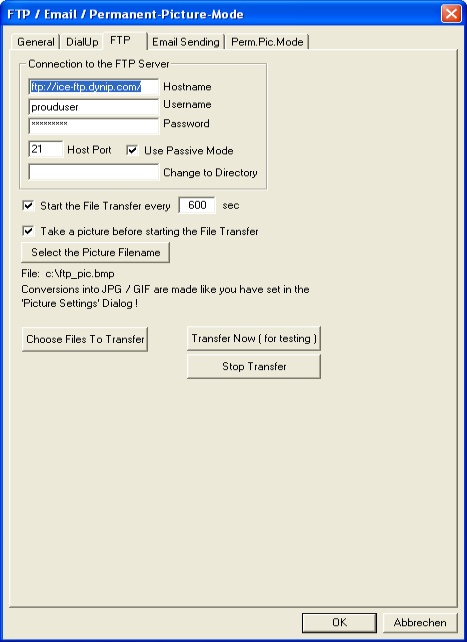
If you are not already online and the program should dial up at PPM start and disconnect at stop after and redial up at restart after, select the dialup before FTP/email/ppm option. You can hide the file transfer status window by selecting the hide the file transfer status window option. Step 4 Select the FTP dialog.
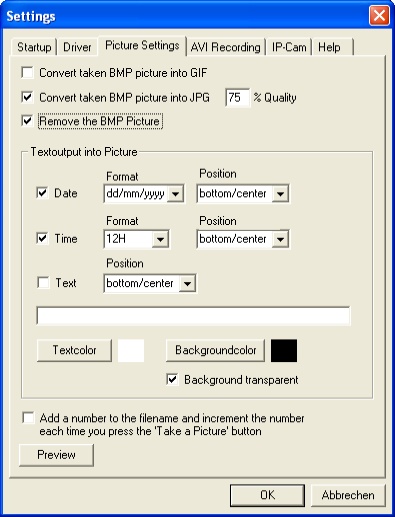
Step 5 main dialog - select picture settings from the settings dialog.
Select convert taken BMP picture into JPG to generate JPG pictures from the taken BMP pictures.There are smaller in size and could be faster uploaded. You can select different options here. Press the preview button to see the result. Step 6
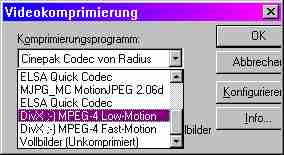
Recording an AVI video in DIVX format Step 1 main dialog - select video compression from the adjust video device section
Your dialog could look different to this one, because it's a dialog of the video device driver manufacturer. You must have installed the DIVX codec for your Windows OS. If this has happend you can select the DIVX codec in the compressor section. Sorry for the german dialog, but you can see the DivX selection. Step 2
Select a filename for the AVI video with select filename from the AVI record section. Press the start AVI record button to start the recording. Now a really small in size AVI is recorded through the DivX codec. |